
Choosing The Correct SPMU Treatment
Almost all of the emails I receive say…
“I am not sure which procedure to go for’’ or ‘‘I will go along with whatever Nez thinks’’ followed by their current brow photos.
To be honest, after 3 years of being my at home assistant, Sophie who replies back to your emails is highly experienced on all treatments. If you are unsure or may have picked the incorrect treatment for your skin type and or skin colour, Sophie will and can advise you.
If I decide on the day that we need to do something else we can of-course work our way around this either on the day or on the top up.
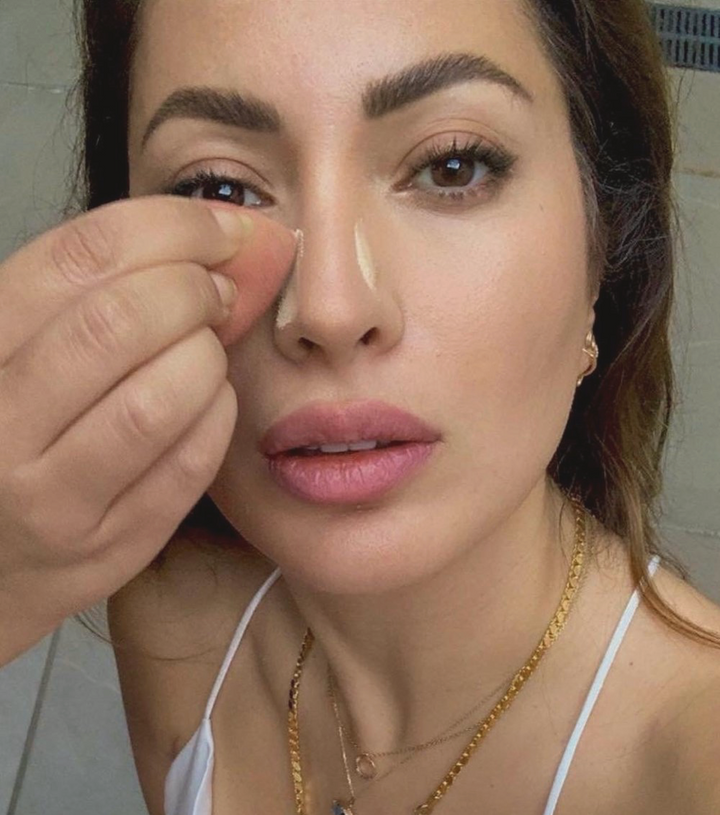
In my brochure, I have some information for which procedure to opt for but here I would like to go into more detail. I will show you photo examples of the three procedures which will be separated these are Microblading, Powder Brows and Microshading. The examples will be of my own work, the first photo is the before and straight after, followed with the healed version 4-6 weeks later. You will also be able to see here the intensity of the colour change from the straight after to the healed.
Please don’t forget the healed photo’s you see here will be the example of the best possible version, as the final results depend on your skin type as every individual heals differently alongside the aftercare that you have kept to.
The decision is your first step, the second most important thing you should now decide on is with who..
The technician who you are about to pick will be working with a blade or a needle on the centre of your face! Your eyebrows!
You never knew it was such a big deal till you saw the transformations on instagram, your friends and your favourite influencers, which now led you to decide that you also want to try microblading… but the question is, it is suitable for you?
Things can terribly go wrong with the wrong technician! You can find out more on this topic on my previous blog post, Every Girls Worst Nightmare.. Red Brows and How To Remove Them!
Almost all of the emails I receive say…
“I am not sure which procedure to go for’’ or ‘‘I will go along with whatever Nez thinks’’ followed by their current brow photos.
To be honest, after 3 years of being my at home assistant, Sophie who replies back to your emails is highly experienced on all treatments. If you are unsure or may have picked the incorrect treatment for your skin type and/or skin colour, Sophie will and can advise you.
If I decide on the day that we need to do something else we can of-course work our way around this either on the day or at the top up.
In my brochure, I have some information for which procedure to opt for but here I would like to go into more detail. I will show you photo examples of the three procedures which will be separated these are Microblading, Powder Brows and Microshading. The examples will be of my own work, the first photo is the before and straight after, followed with the healed version 4-6 weeks later. You will also be able to see here the intensity of the colour change from the straight after to the healed.
Please don’t forget the healed photo’s you see here will be the example of the best possible version, as the final results depend on your skin type as every individual heals differently alongside the aftercare that you have kept to.
The decision is your first step, the second most important thing you should now decide on is with who..
The technician who you are about to pick will be working with a blade or a needle on the centre of your face! Your eyebrows!
You never knew it was such a big deal till you saw the transformations on instagram, your friends and your favourite influencers, which now led you to decide that you also want to try microblading… but the question is, it is suitable for you?
Things can terribly go wrong with the wrong technician! You can find out more on this topic on my previous blog post, Every Girls Worst Nightmare.. Red Brows and How To Remove Them!
Microblading
Microblading is one of the most popular treatments available it is the fine individual stroke effect brow tattoo that will be created to manipulate your own brow hair direction, it is the most natural option but in my view the strokes that are created once healed will look more natural depending on your own brow hairs, skin type and skin colour, they can merge into one after a while.
If your t-zone is normal then you’re a very good candidate for microblading. Normal t-zone with brows that are a medium size to fuller but just sparse will look great especially if your brow hairs are fine and flat not coarse and curly.
Everything I mention is honestly a possibility,
Everyone can try this option but you have to remember the possible outcomes outlined and that it is not magic! My team and I have been pleasantly surprised many times with how amazing results have turned out on people we thought it will not work on due to more bleeding or very oily t-zones!
If you were to bleed more than the usual during the procedure, this can effect the pigment to not hold onto the skin well, but I also have my own ways to deal with this situation if it were to happen (my secrets).
I find that usually dry t-zones have more of this issue. Sometimes you are able to tell before if you may be a bleeder for example very pale skin and visible capillaries (veins) around the eye area can indicate that you have thin skin around your brows. What I call spotty bleeding is normal, anything excessive can merge your strokes together or a possibility of making them all come off, this also apples to oily skin.
Don’t worry, you do not bleed after the treatment it is only as each stroke is created and stops straight away.
To be honest, I have probably seen them completely disappear max 5 times in all these years on skin that is oily and bled more than the usual, the rest have healed as it should and look amazing.
If the pigment has faded drastically then we can add shading in the first top up when you come back 4-6 weeks later but its better to do this in the first session.
Furthermore, I wouldn’t recommend microblading on very thin to no brows if you wish it can be well achieved but you will need to colour them in a-bit using the new shape created. I also wouldn’t recommend microblading on darker skin tones and/or very oily t-zones. On these types, especially with little to no hair when the pigment fades you will see more gaps than usual, and on darker skin when healed the strokes are not as visible.
Also I would like to add it is not ideal to stay very thin with microblading as when working I have no flexibility on space while trying to stay as thin as possible. If you want your brows super-thin please don’t do any treatments leave them as they are. When they heal they shrink in size a lot leaving you with barely-there microbladed brows. Anyone who made me do this emailed to say can we go thicker, Nez was right! And I really can’t do this as it will go way over your time frame in your second appointment.
Microblading photos examples of the before, straight after and healed.
GALLERY HERE
Powder Brows
This is the art of shading to create a soft powder effect by creating a very light hue at the beginning of the brow to a much darker hue on the tail of the brow giving it an ombre effect. Just like how you may colour in your brows with a pomade except this has lasting power.
This is my favourite option and it is what I get done because I have thin size brows, my brow hairs are not so fine and are dark, my skin is super oily and it has not a warm undertone so I tend to turn more ashy than usual. I love getting my regular top ups especially before holiday’s for fresh fuller looking brows!
With powder brows/shading you can have regular top ups when you want to refresh them, when ever you want the only downside is the first week you will not want to bump into any enemies so lay low! You will however fall in love with them a week to 10 days later.
Powder brows is an option that everyone can go for. If you have very light sparse brows they look amazing, on dark skin tone girls it looks the best and most advisable as it will add that definition you need, if you have curly or coarse brow hair and if you like the daily make up look. In general it’s a choice of taste as its suitable for everyone.
Powder Brows photo examples of the before, straight after and healed.
GALLERY HERE
Microshading
Microshading is the combination of the two above, it’s as easy as that. So you have the stroke effect and then over that you will have the powder effect which is created with a tattoo machine and needle just like the powder brows. The two combined will give you a fuller and more defined look. Let's not get confused anymore, some people call this combination brows, some call it feather brows and some call it microblading and shading, I’ve called it micro-shading for short.
It was not so popular a few years ago as it looks strong just like the powder brows and when people see the straight after they worry, but once healed they all love it as you will see such a big change at how soft they turn out. I found that over time with my clients it has become a lot more popular as I have a lot of top ups booked for shading added (basically powder brow technique), people have started to see the difference and are booking in microshading depending on their skin tone and type. I like to finalise this technique with a much lighter and softer shading on the skin almost like a light shadow in-between the strokes to create a natural brow when healed.
If you have little to no hair this is what you need to choose. Alongside having very thin barely-there brows you can have this treatment with any skin type. However, with oily t-zones when we see the healed brows 4 plus weeks later, a lot of the strokes may have disappeared. We can decide at the top-up session if we want to add more strokes or more shading as sometimes the shading has given amazing soft results or vice versa we just add strokes.
If you are of darker skin tone, and have no hair then we have to go for this option as Microblading on its own when healed on darker skin does not show any results.
If you have curly brows, again this option is better for you rather than microblading on its own as when doing just strokes on these types of brow hairs the strokes does not camouflage well with the natural curly hair.
I hope all this has helped you understand the different treatments. If you have any thoughts or are still unsure what to pick please leave a comment below. x
Microshading photo examples of the before, straight after and healed. From left to right; dark and oily skin, pale skin with little to no brows, dark oily skin, pale and combination skin with no tale hair.
GALLERY HERE